


From SSKE
| The QueryInterface
Learn to query for data |

|
|
Fred always has much work to do and finds it very handy to overview his tasks in well-arranged tables. For this, he wants to create a table that not only contains all relevant information, but also gets automatically updated everytime something has changed or was created. You can help him to create the table by using one of SMW+/Halo's basic features: the Query Interface.
Open the QueryInterface
- Select from the Articles and data-menu the menu item QueryInterface
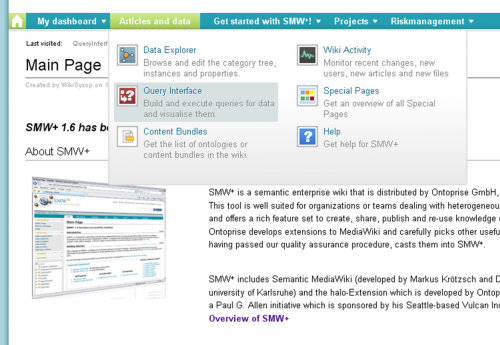 Click on the "QueryInterface" menu item to open the QueryInterface.
- The QueryInterface opens.
 The Query Interface special page.


Result: the QueryInterface is open and you can start building your query.
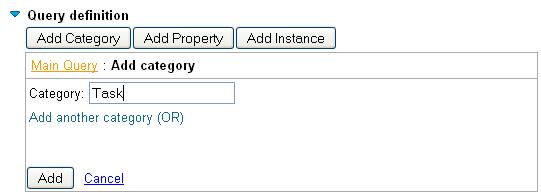
Build the query
- Click Add category. Like in the Data Toolbar you can press Ctrl + Alt + Space to use autocompletion.
- Enter Smwplussandbox/Task
- Click Add.
- Below the section Result preview you should now see all articles ("instances") that contain the category tag "Smwplussandbox/Task". You will also notice your new task "Update screenshots":
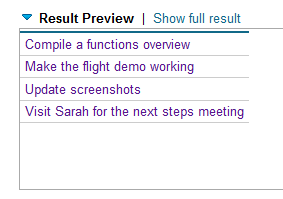 The list of query results is located in the "Result preview" section.
- In order to restrict the results to Freds tasks, you click on Add property
- Enter Smwplussandbox/Assigned to
- Activate the checkbox Show in results to list the property values in the result preview
- Activate the checkbox Value must be set to get only results that have explicitly this property
- Activate the radiobutton Specific value
- Enter User:Fred in the field property value
- Click Add.
Your screen should look similar to this: Restrict the values of query results.
- Open again the Result preview to verify that it contains only tasks that belong to Fred.


Result: You have created a query for all tasks that belong to a Fred.
You can add more properties (e.g. End date, description...) if you like and do this via trial and error in the Query Interface until you are satisfied with the results. And if you have the Semantic Result Formats extension installed, you can also use timelines, 3d-bars, pie-charts, maps etc. to visualize the data.
| Note: | If you call the QueryInterface from within the WYSIWYG editor then you can embed the result table into the article. |
Embed a query into an article
- Open the article that you have created in Lesson 1: Create articles.
- Open the article in the WYSIWYG editor by clicking on the "Edit"-tab.
- Place the cursor somewhere in the text of the article.
- Click on the "Query Interface" icon to open the Query Interface.
- The Query Interface must be visible as an overlay in the WYSIWYG editor.
- Click Add category. Like in the Semantic Toolbar you can press Ctrl + Alt + Space to use autocompletion.
- Enter Smwplussandbox/Task
- Click Add.
- Below the section Result preview you should now see all articles ("instances") that are assigned to the category "Task". You will also notice your new task "Update screenshots":
- Click on the button "Insert Query" (located at the bottom of the overlay) to embed the query result into the article.

Result: the query result is embedded into your article.
Next Lesson
| |
|
|
|---|---|---|
| Tried out enough? Then it's time to go to the next sandbox: Create your own data model with the DataExplorer |
|
|
| Part of bundle | Smwplussandbox + |
| Rationale | This article is the second sandbox of the SMW+ sandbox tour. It gives some basic hints to the Query Interface, provides demo content elements and an area where users can check out the editor and play with the content elements. + |