From SSKE
| The DataExplorer
Build your datamodel |
|
|
A big plus of SMW+ is the extensibility of the data model. The data model comprises the categories and their properties. They become visible in the factbox, Data Toolbar and the DataExplorer that is the central tool to add categories and properties.
In this lesson you learn how to add a category and properties to the data model. The goal of this lesson is to specialise the existing Category:Smwplussandbox/Project by introducing a Category:Marketing report.
Inspect the data model
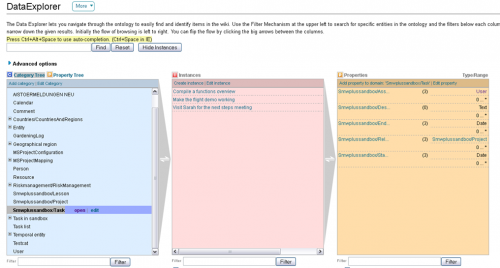
The DataExplorer gives a quick and detailed overview of the wiki's datamodel. You can navigate through the categories and properties contained in the datamodel. You can also inspect the instances (articles) and their annotations. And not least you can add, change, or delete elements of the datamodel here.
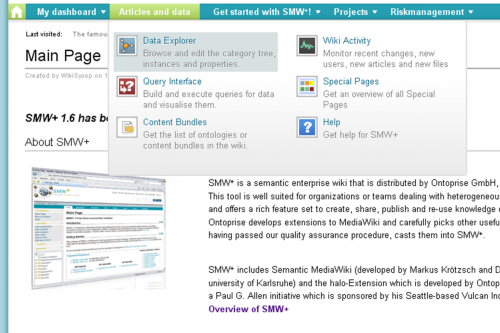
- Select from the Articles and data-menu the menu item DataExplorer (make sure that it is opened in a new tab!)
- The DataExplorer opens.
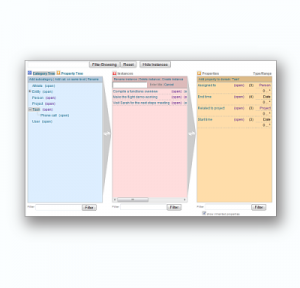
- Inspect the three columns: category tree, instances and properties
- Note that the browser has a threefold view, where every column represents another dimension of the datamodel: the CategoryView (left) shows the category hierarchy. Click on a label to select it. The presence of subcategories is indicated by the "+". Clicking on a category makes visible all articles belonging to this category in the middle InstanceView. Also, the PropertyView (right) containing the content descriptors will be updated.
Add a category
- Make sure that you are logged in into the Wiki.
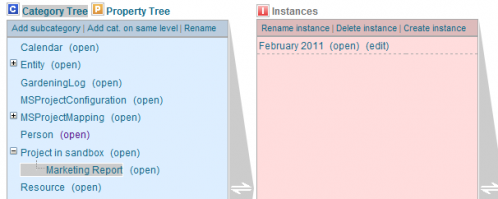
- Select the category "Smwplussandbox/Project" and then click on "Add category"
- In the microform, enter into the name-field the value "Marketing Report" and in the Subcategory of-field enter "Smwplussandbox/Project".
- Click on "Add"
Result: A new category is visible in the category tree.
Add a property
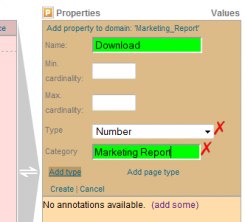
- Select the new category "Smwplussandbox/Marketing Report" in the CategoryView and then click on the link "Add property" in the PropertyView.
- A micro form to add a new property comes up.
- Enter "Publication date" into the name field and select "Date" as type. Click on "Add" to create the new property.
Result: The new property "Publication date" is visible in the PropertyView of the category "Smwplussandbox/Marketing Report".
You can add as much properties as you like, e.g. "Number of downloads", "Product page clicks" etc. Don't forget to define the correct type for each property, e.g. "Number" or "String".
Add an instance
- Select the new category "Smwplussandbox/Marketing Report" in the CategoryView and then click on the link "Create instance" in the InstanceView.
- A micro form to add a new instance comes up.
- Enter the name of the new instance into the "Name" field, e.g. "February 2011" or "Report for February 2011".
- Click on "Add" to create the new instance
Result: you have a new article in the wiki that is an instance of the Category Marketing Report.
Edit an instance
- Select the instance in the InstanceView and click on "open" (in the same line of the instance) to open the instance in this tab.
- Click on "Edit" to open the article in edit mode.
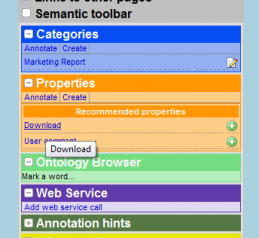
- Switch ON the Data Toolbar (if not already open).
- In the Data Toolbar you can change the value of properties:
- To enter new tags, click on plus symbol on the right, enter a value in the red field and confirm your entry with "add".
- save the page and verify the data in the Fact Box.
Result: your instance has now new or additional data.
Go back to the DataExplorer and verify that the data. If you select the "February 2011" instance again, you will see all of your values in the property column.
Conclusion
As demonstrated you can easily curate the data model (categories and properties) with the DataExplorer GUI. This sandbox was the reverse way of creating annotations on the basis of a given content (as shown before in Lesson 2). This means, you can choose a suitable way of creating semantic content depending on your special needs.
The next step would be to make use of this structure, e.g. by creating a tabular form that also allows users not familiar with the software to enter new instances and/or their values. You could start writing the actual report and include a dynamic table showing e.g. the development of the download figures. Note that possibilities to use the structure defined in the ontology are capacious and highly flexible.
Next Lesson
| |
|
|
|---|---|---|
| In the next lessons you will be given directions for extending your wiki with extensions and WikiApps and where to find more examples: More resources! |
|
| Part of bundle | Smwplussandbox + |
| Rationale | This article explains how to create and edit own datamodel with the DataExplorer GUI. + |


